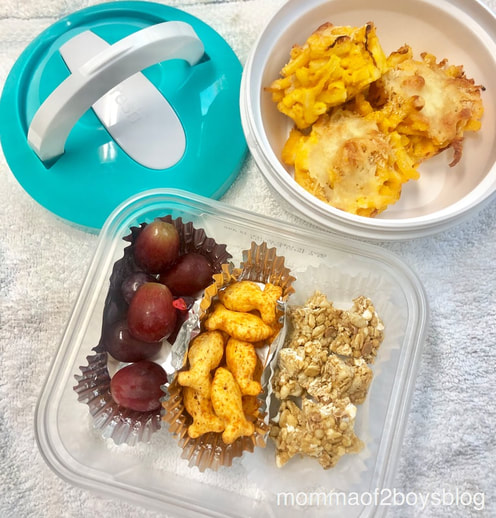
(Make-A-Head-Lunch) Mac N' Cheese Muffins
Give your child that warm and comforting feeling by eating these Mac n' cheese muffins during their lunch. I've had these and they are oh so delish! What's also great is I put a secret ingredient in my Mac n' cheese to make me feel a little better as a momma :)
Ingredients:
1. Mac N' Cheese (in box)
2. carrots
3. chicken broth
4. milk
5. bread crumbs
6. shredded mozzarella cheese
Directions:
1. pre-heat oven to 400 degrees Fahrenheit
2. cook Mac n' cheese according to box instructions
3. while Mac n' cheese is cooking blend carrots, chicken broth, and milk in a blender or food processor. Blend until smooth and base it on the consistency you want. If you want sauce to be thicker, add more carrots than liquid.
4. Pour carrot mixture in Mac n' cheese.
5. Use a spoon to pour cooked Mac n' cheese in a muffin tray. top with bread crumbs and shredded mozzarella cheese
6. bake for 15 mins or until cheese on top is nice and melted.
7. let cool and then you can throw in freezer.
Once ready to be eaten:
microwave each Mac n' cheese muffin for 1 minute or until nice and warm (microwave wattage all vary)
(MAke-a-head-lunch) SANDWICH thin pizza
An easy make-a-head lunch for your kiddo, throw it in the freezer, and microwave once they are ready to eat. Takes less than 20 mins and your kid can help you with it every step of the way.

Ingredients:
1. Sandwich Thins
2. tomato sauce for pizza
3. ham/pepperoni
4. shredded mozzarella
Directions:
1. Pre-heat oven in 400 degrees Fahrenheit.
2. Lay your sandwich thins on a baking tray.
3. top with tomato sauce, ham/pepperoni, and cheese.
4. put in the oven for for 15 mins. or until cheese is nice and melted.
5. Let cool then put in freezer
When ready to eat:
Throw pizza in microwave for 1 minute or until nice and warm (microwaves varies in wattage)
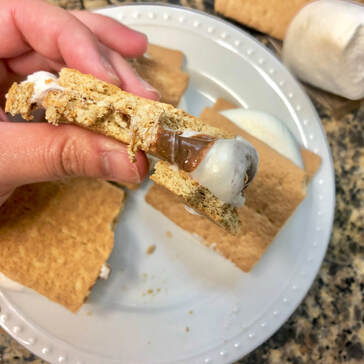
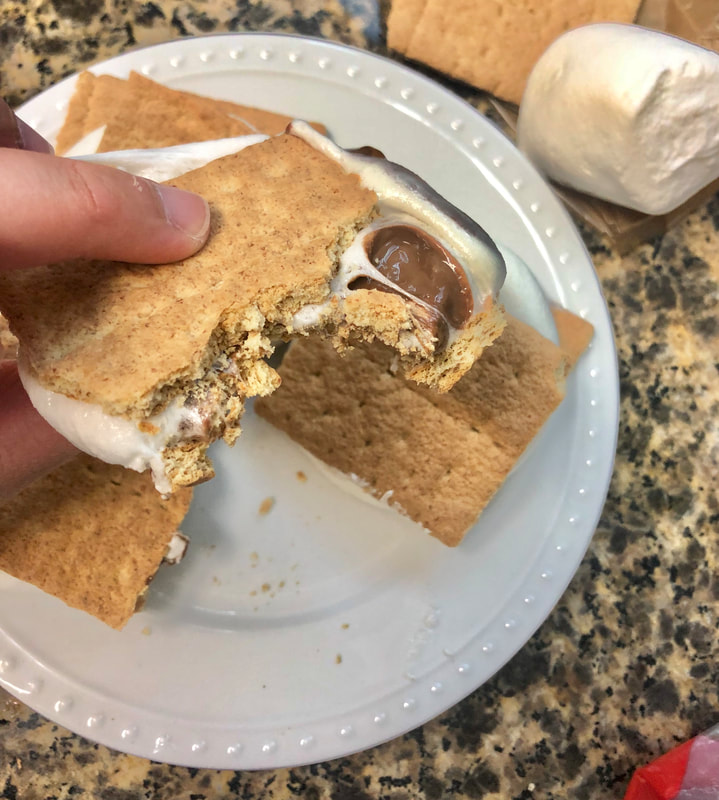
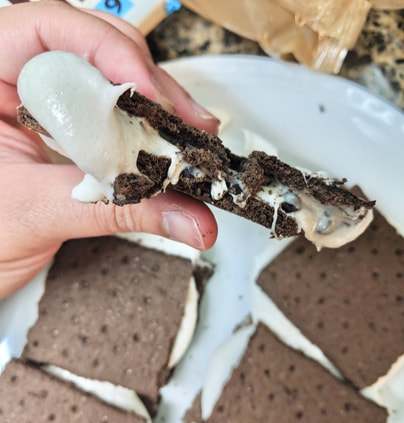
EAsy Gooey SMores (MInus the camping)
No need to go camping to make this summer classic because all you need is a microwave! I get that the whole roasting in front of a camp fire can't be beat, but once you taste the gooey mixture of the marshmallows and melted chocolate bars- you won't be needing anything else!
Ingredients:
6 Graham Crackers
3 Marshmallows (I like to use the jumbo size and cut them in half)
2 Hershey's chocolate bars
Directions:
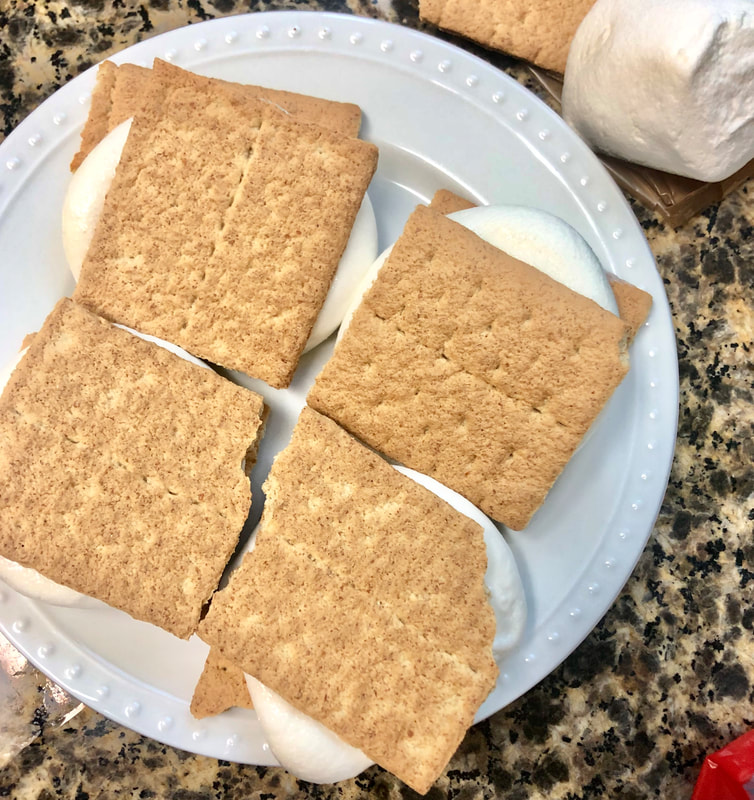
1. Cut Graham crackers in half
2. place chocolate bars on top of graham crackers
3. Cut Marshmallows in half and place on top of chocolate bars
4. Microwave for 20-30 seconds based on your microwave settings
5. Top with Graham crackers
6 Graham Crackers
3 Marshmallows (I like to use the jumbo size and cut them in half)
2 Hershey's chocolate bars
Directions:
1. Cut Graham crackers in half
2. place chocolate bars on top of graham crackers
3. Cut Marshmallows in half and place on top of chocolate bars
4. Microwave for 20-30 seconds based on your microwave settings
5. Top with Graham crackers

Ingredients:
6 Graham Crackers
3 Marshmallows (I like to use the jumbo size and cut them in half)
2 Hershey's chocolate bars
Directions:
1. Cut Graham crackers in half
2. place chocolate bars on top of graham crackers
3. Cut Marshmallows in half and place on top of chocolate bars
4. Microwave for 20-30 seconds based on your microwave settings
5. Top with Graham crackers
Ayden's favorite version of our easy gooey smores. I personally like the traditional version of the smores, but who am I to judge his taste buds!
Ingredients:
6 Graham Crackers (Chocolate)
3 Marshmallows (I like to use the jumbo size and cut them in half)
2 Hershey's Cookies n' Cream bars
Directions:
1. Cut Graham crackers in half
2. place chocolate bars on top of graham crackers
3. Cut Marshmallows in half and place on top of chocolate bars
4. Microwave for 20-30 seconds based on your microwave settings
5. Top with Graham crackers
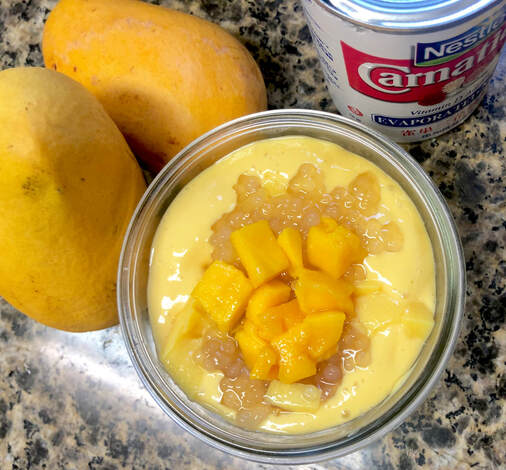
Mango Pudding with tapioca
Oh my sweet delicious mangoes! Mangoes are my all time fave and just reminds me of my childhood! This recipe was inspired by our recent trip to the Philippines and once you taste the creamy mixture of the pudding with the sweet, yet slightly tartness of the mangoes, you will feel like you're in a tropical paradise! Perfect for those warm summer days!
|
Ingredients:
Fresh Mangoes Mango Pudding Mix Tapioca Pearls (Small) Condensed Milk (Optional) Evaporated Milk Directions: 1. Make Mango Pudding Mix based on instructions. 2. Make tapioca pearls based on the instructions and brown sugar for slight sweetness. (I had a hard time making our pearls, so I will link a youtube video tutorial for reference.) 3. Cut Fresh ripened mangoes and blend with ice, evaporated milk, and depending on the tartness of your mangoes, you can mix with condensed milk for added sweetness. Blend mixture until smooth. 4. Once pudding is ready, cut into small squares. 5. Cut fresh ripened mangoes into small squares (same size as your mango pudding) 6. Get a dessert bowl 7. Place diced mango pudding at the bottom of the bowl, layer smoothie mango on top of mango pudding, layer diced fresh mango on top of smoothie, and top of the fresh mangoes with more smoothie. 8. Top layers with tapioca pearls and more sliced fresh mangoes to your liking! |
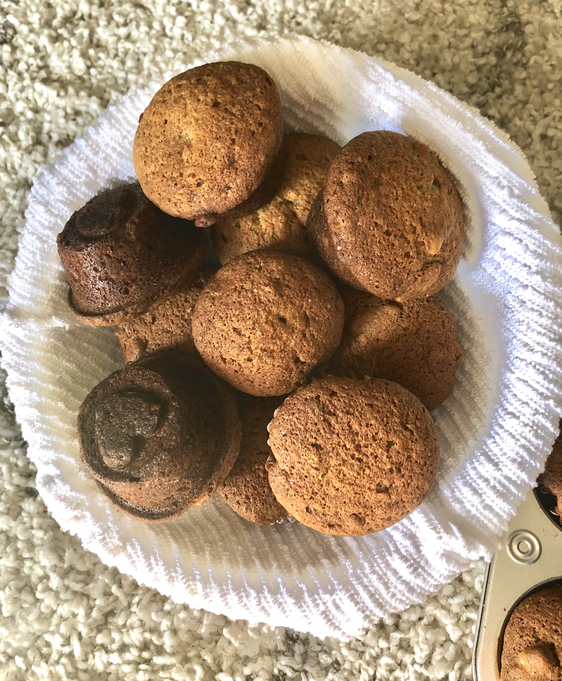
BANANA NUT MUFFINS
My family always has over ripened bananas and I'm not a big fan of ripened bananas. They can taste too mushy and too sweet, but I LOVE LOVE them for making Banana Nut Muffins. My house always have them because we always have over ripened bananas. They are super easy to make, my boys love them, and I feel like they're healthy because they have bananas in them.
INGREDIENTS:
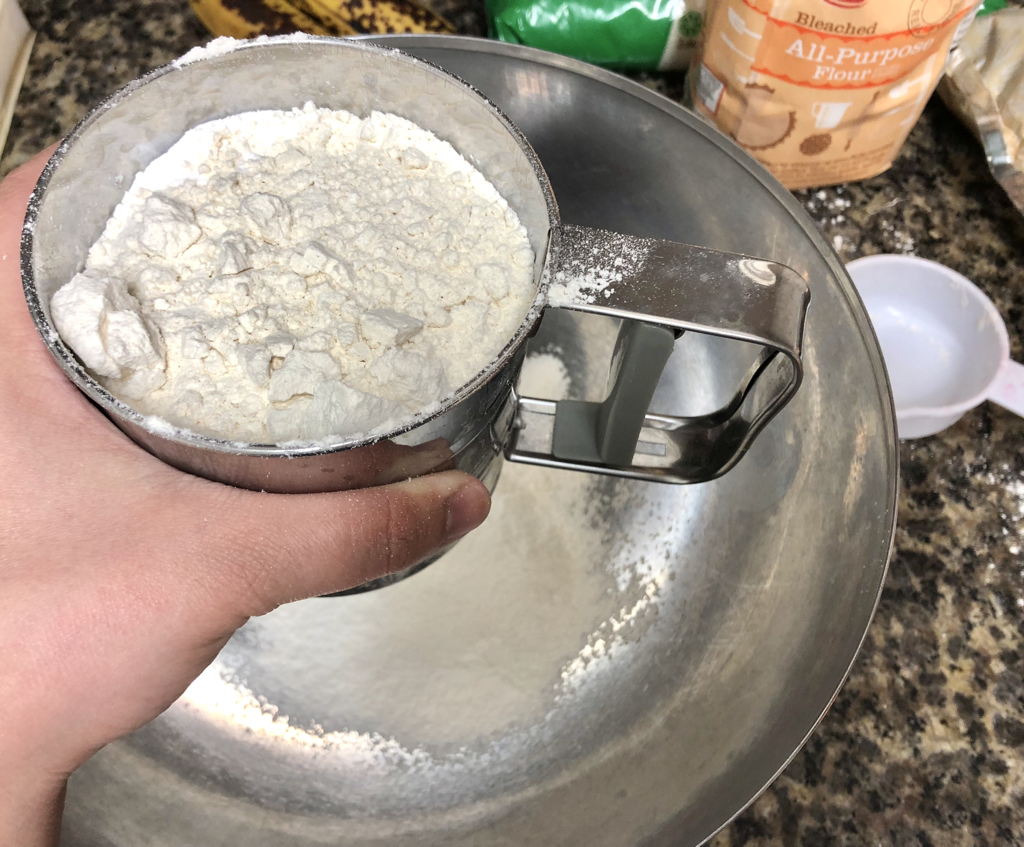
1. 2 Cups of Flour
2. 1 tsp of salt
3. 2 tsp of baking soda
4. 2 cups of white sugar
5. 1 cup of butter/margarine
6. 2 cups of mashed over ripe bananas
7. 4 eggs beaten
8. 1 cup chopped walnuts (you can add more if you want)
9. 1 tsp of pure vanilla extract
10. 1 tsp of ground cinnamon
1. 2 Cups of Flour
2. 1 tsp of salt
3. 2 tsp of baking soda
4. 2 cups of white sugar
5. 1 cup of butter/margarine
6. 2 cups of mashed over ripe bananas
7. 4 eggs beaten
8. 1 cup chopped walnuts (you can add more if you want)
9. 1 tsp of pure vanilla extract
10. 1 tsp of ground cinnamon
Directions:
1. Pre-heat oven to 350 degrees.
2. Sift Flour, salt, and baking soda in a large bowl
3. In another bowl, mix sugar and butter until smooth. Add bananas, eggs, walnuts, vanilla, and cinnamon. Mix thoroughly.
4. Add wet mixture into dry mixture and mix until smooth.
5. Place in muffin trays and bake for 15-30 mins.
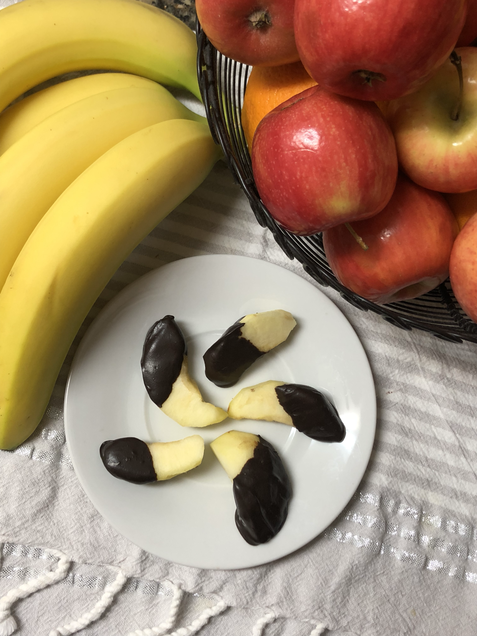
CHOCOLATE COVERED APPLES
This kid-friendly snack is perfect for after school snacking. Ayden attends a PM Kinder class and only gets a snack during the 3 hours he's in school. So I typically likes to make him a snack after school to get him through until dinner time. I like to try and stay healthy with my snack options, but also make it a treat for him. I decided to make this snack for him because his dentist recommended that he eats apples to help his loose tooth fall out, you can refer back to my "AM I A SHARK OR SOMETHING" blog post to read the whole ordeal with his teeth. Any ways, I hope you enjoy this simple treat, you can even have the kids help you out and they'll have a blast
INGREDIENTS
1. Apples
2. Chocolate for dipping (You can find some that are microwavable to make it easier)
1. Apples
2. Chocolate for dipping (You can find some that are microwavable to make it easier)
Directions:
1. Peel and cut apples into slices.
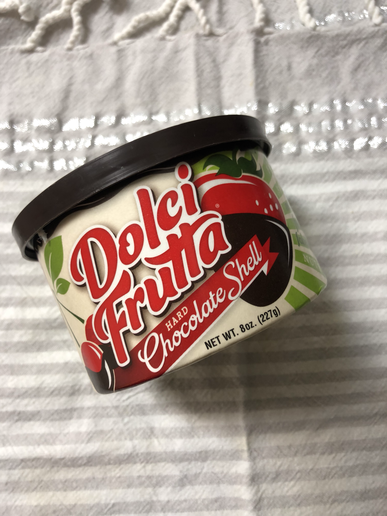
2. Microwave chocolate, I used Dolci Frutta (Hard chocolate Shell) It's microwavable and hardens easily so you can eat sooner!
1. Peel and cut apples into slices.
2. Microwave chocolate, I used Dolci Frutta (Hard chocolate Shell) It's microwavable and hardens easily so you can eat sooner!
GRILLED CHEESE AND TOMATO BISQUE
Perfect comfort food for a cold or rainy night. Ayden loves grilled cheese any day of the week, but pair it with this creamy tomato bisque soup - and he's in heaven!
Ingredients:
Grilled Cheese
2 slices of Sourdough Bread
1/4 cup of mild cheddar cheese
1 tbs Butter
Tomato Bisque Soup
1/2 cup of diced onions
1 tbs olive oil
4 cups canned diced tomatoes or fresh chopped tomatoes
1 cup of chicken broth
1/2 cup of heavy whipping cream
2 tbs of cream cheese
2 tbs of finely chopped basil
salt/pepper
Directions- Tomato Bisque Soup
1. Sauté onions in olive oil, once translucent, add diced tomatoes .
2. Add chicken broth, salt/pepper, chopped basil, and let simmer for 10 mins.
3. Add heavy cream and cream cheese, mix until cream cheese dissolves
4. For smooth and creamy soup, use immersion blender.
Directions- Grilled Cheese
1. Butter slices of sourdough bread, lay both slices on pan until lightly brown.
2. Turn over slices and as other side is being toasted, place mild cheddar cheese on one of the slices.
3. Take other slice without the cheese and place on top of cheese until melted. Serve immediately.
Mushroom Salad
Momma's gotta eat too!!! And I'm more of a snack type of momma. This mushroom salad is super simple and literally takes 5 mins to make. Did you know that Mushrooms are high in You can pre-make and eat as you please!

Ingredients:
8 oz of fresh button musrhrooms
1/4 cup of traditional romano cheese
1 tsp of salt
1 tsp of pepper
1 half of lemon (juice)
1 tbs of olive oil
1tbs of fresh parsley
Directions:
1. Thinly slice button mushrooms
2. Mix mushrooms, salt, pepper, lemon juice, olive oil, romano cheese, and parsley
3. Place in Fridge to let sit for an hour. The mushroom will soak in the lemon juice and olive oil for better taste.
1. Thinly slice button mushrooms
2. Mix mushrooms, salt, pepper, lemon juice, olive oil, romano cheese, and parsley
3. Place in Fridge to let sit for an hour. The mushroom will soak in the lemon juice and olive oil for better taste.
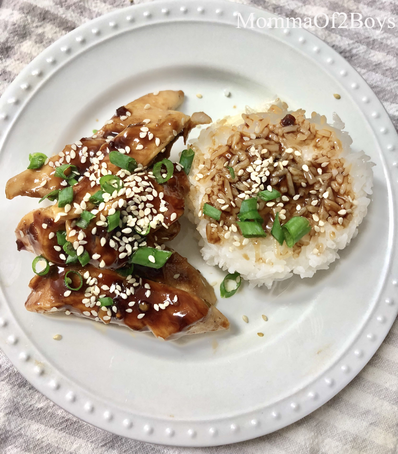
Teriyaki Chicken
This is a fast and easy dish to create during a weeknight. The Teriyaki Sauce is a recipe I got from CookwithApril on Youtube. Do we not only have the same amazing name, but she also is an amazing mom and a wonderful cook. I've been following her for years. View her youtube chanel for her other amazing recipes! Super simple and kids love it!
Ingredients:
Chicken Breasts (cut into strips)
1 scallions (finely chopped)
sesame seeds
Teriyaki Sauce:
1/2 cup of soy sauce
1/2 cup of water
3 tsp. ginger
4 tsp. garlic
4 tbsp. brown sugar
4 tbsp. honey
1/2 lemon (juice)
2 tbsp. of corn starch
Chicken Breasts (cut into strips)
1 scallions (finely chopped)
sesame seeds
Teriyaki Sauce:
1/2 cup of soy sauce
1/2 cup of water
3 tsp. ginger
4 tsp. garlic
4 tbsp. brown sugar
4 tbsp. honey
1/2 lemon (juice)
2 tbsp. of corn starch
DIRECTIONS:
1. In a small sauce pan, mix Teriyaki sauce ingredients on low heat. Stir occasionally until sauce becomes thick.
2. Place Chicken Breast strips in baking pan and back for 10 mins, then flip chicken strips on other side and bake for another 10 mins. Once chicken is thoroughly cooked, brush a moderate amount of teriyaki sauce on top of the chicken a bake for another 5 mins.
3. After baking, top with more Teriyaki sauce as you would like. Garnish with finely chopped scallions and sesame seeds. Pair with white rice.
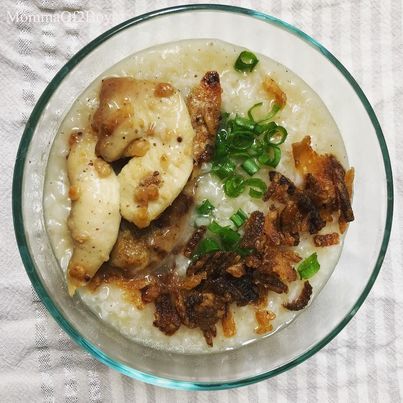
Rice Porridge with Chicken
An easy dish to create during a cold or rainy weather. This Filipino dish is a favorite that can be eaten any time of day. What I love about this dish is that you can put whatever topping you want and customize it to your taste bud.
with nIngredients:
1/2 tsp of salt
1/2 tsp of pepper
1 tbs of sliced garlic
1 small yellow onion
1 tbs of minced ginger
1 scallion finely chopped
1 cube of chicken bouillon
3 cups of chicken stock
3 cups of water
1 cup medium grain white rice
1/2 lbs of skinless chicken leg thighs with bones
1/2 lbs of chicken breasts (cut into strips)
Directions:
1. Sauté ginger and onion in a cooking pot, once onions are clear, add chicken leg thighs with bones (Sautéing the Chicken leg thighs with bones will give the rice porridge better taste).
2. Cut chicken breasts into strips and bake for 15- 20 mins under 325 F or until thoroughly cooked. Set aside and we will use this as the topping. The chicken breasts strips are easier for my kiddos to eat, they don't like bones in their soup.
3. Once chicken thighs starts to brown, you can add the white rice, chicken stock, water, salt, pepper, and chicken bouillon to taste. Bring to boil, lower heat, and stir occasionally until rice is thoroughly cooked.
4. In another skillet, use olive oil on medium-high heat and add the sliced garlic. Wait until golden brown, then drain garlic chips in paper towel to absorb any excess oil.
4. If you would like a thicker consistency, you can use sweet rice in 1:1 ratio with the white rice.
5. Use ladle to put porridge in bowls, top with the garlic chips, scallions, and baked chicken breasts strips. You can also add sliced boiled egg for better taste and heartier meal!
